Documentation of Sell e-Books Theme By WPDigiPro
About Sell e-Books Theme
Sell e-Books Theme By WPDigiPro is a premium quality WordPress theme for Sell e-Books, build for digital agencies, freelancers and other digital uses. The Theme is SEO friendly. mobile responsive, which is built on top of SiteOrigin Page Builder, and supports other page builders as well, such as, Elementor, hence different types of pages can be created using drag and drop features of the page builder.
Thanks!
WPDigiPro Team
Features
EYE CATCHY, MODERN DESIGN
Sell e-Books Theme makes your websites look stunning and impressive. So you’ll never miss any potential traffic.
FULLY MOBILE RESPONSIVE
Sell e-Books Theme makes your website 100% mobile friendly. So your website looks perfect in mobiles, ipads, PCs, Mac and all other devices.
HIGHLY SECURE
Sell e-Books Theme is a very secure WordPress theme as it's been built based on WordPress.org guidelines.
SOCIAL MEDIA ICONS
You can add upto 5 social media icons and links using Font Awesome icons as per your choice.
Theme Installation
Step 1 - Click here to download Sell e-Books theme from wordpress.org
or you can directly search Sell e-Books from your WordPress admin panel.
Step 2 - Click on Add New button.
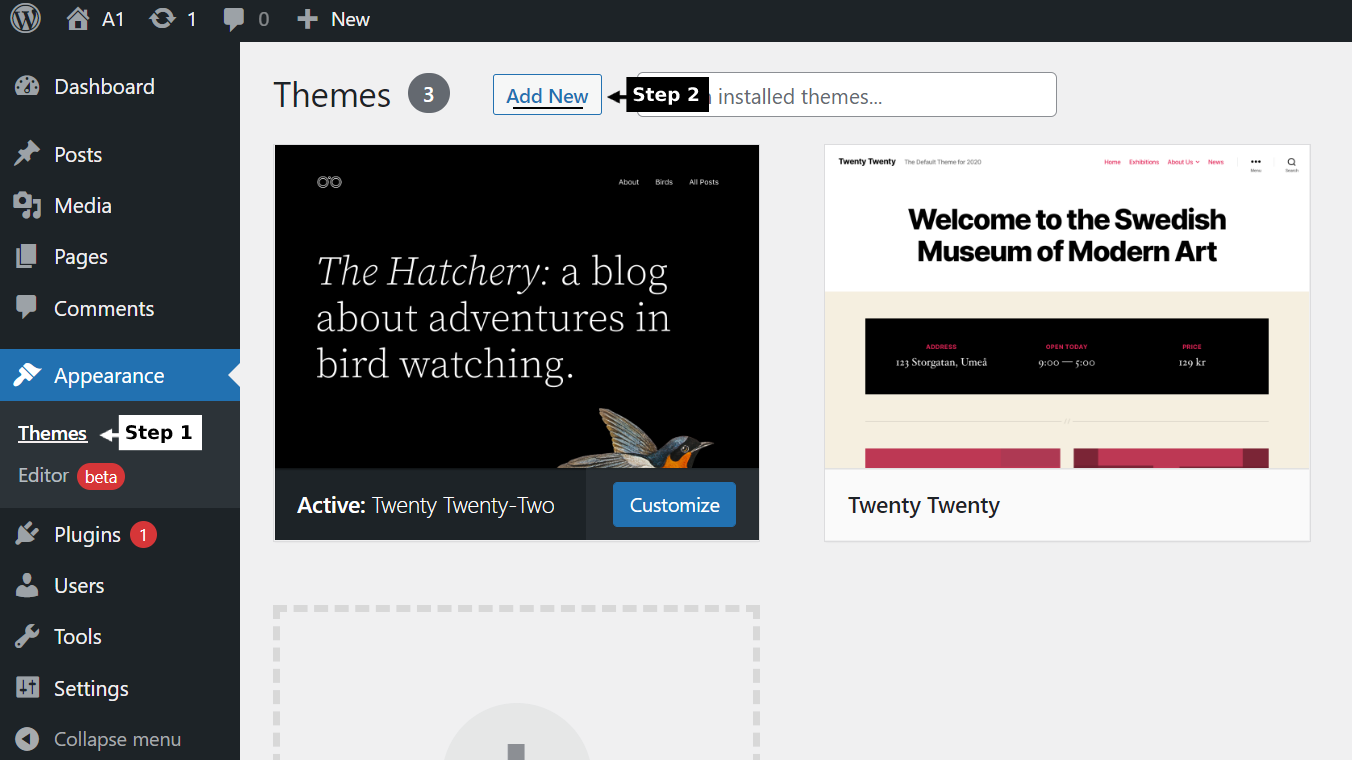
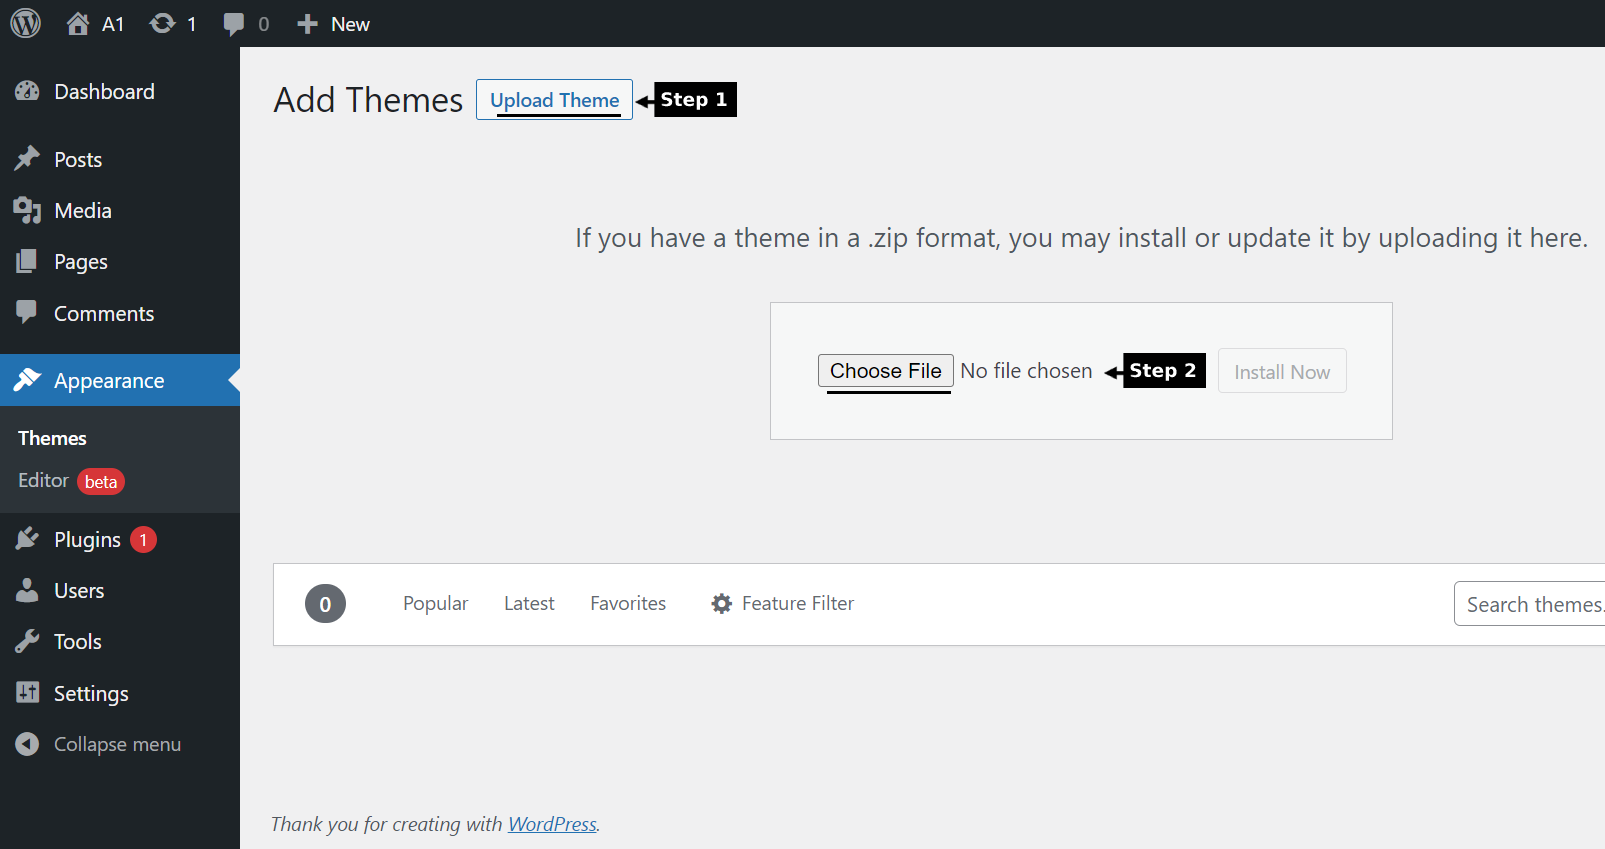
Step 3 - Click on Upload button at the top of the screen.
Step 4 - Choose sell_ebooks_theme.zip and click on the Install Now button.
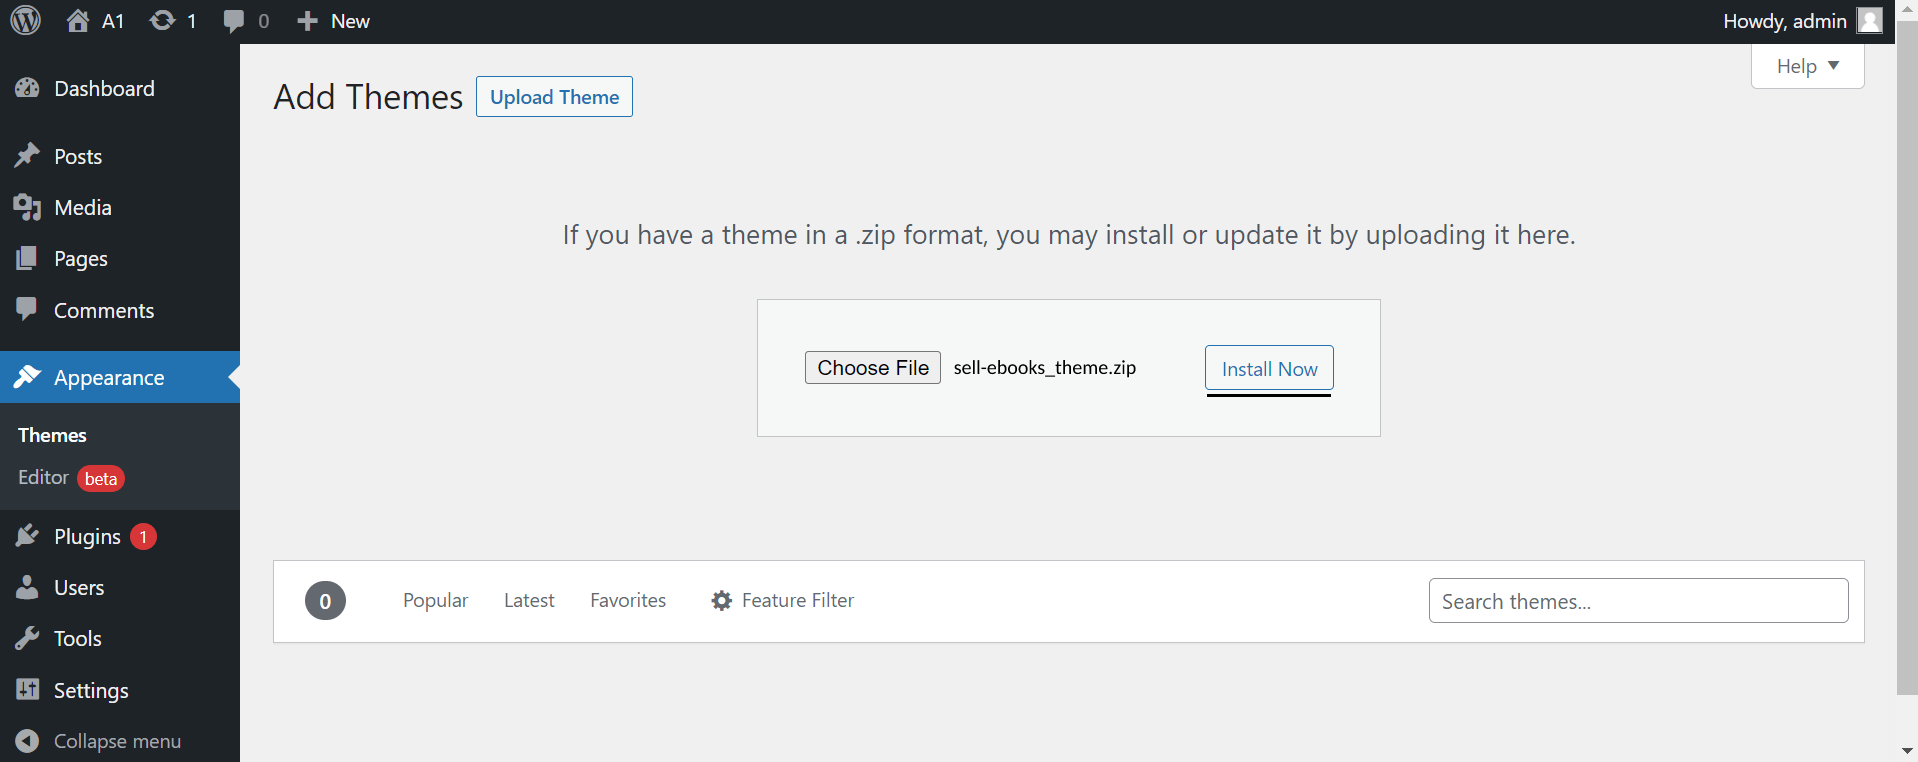
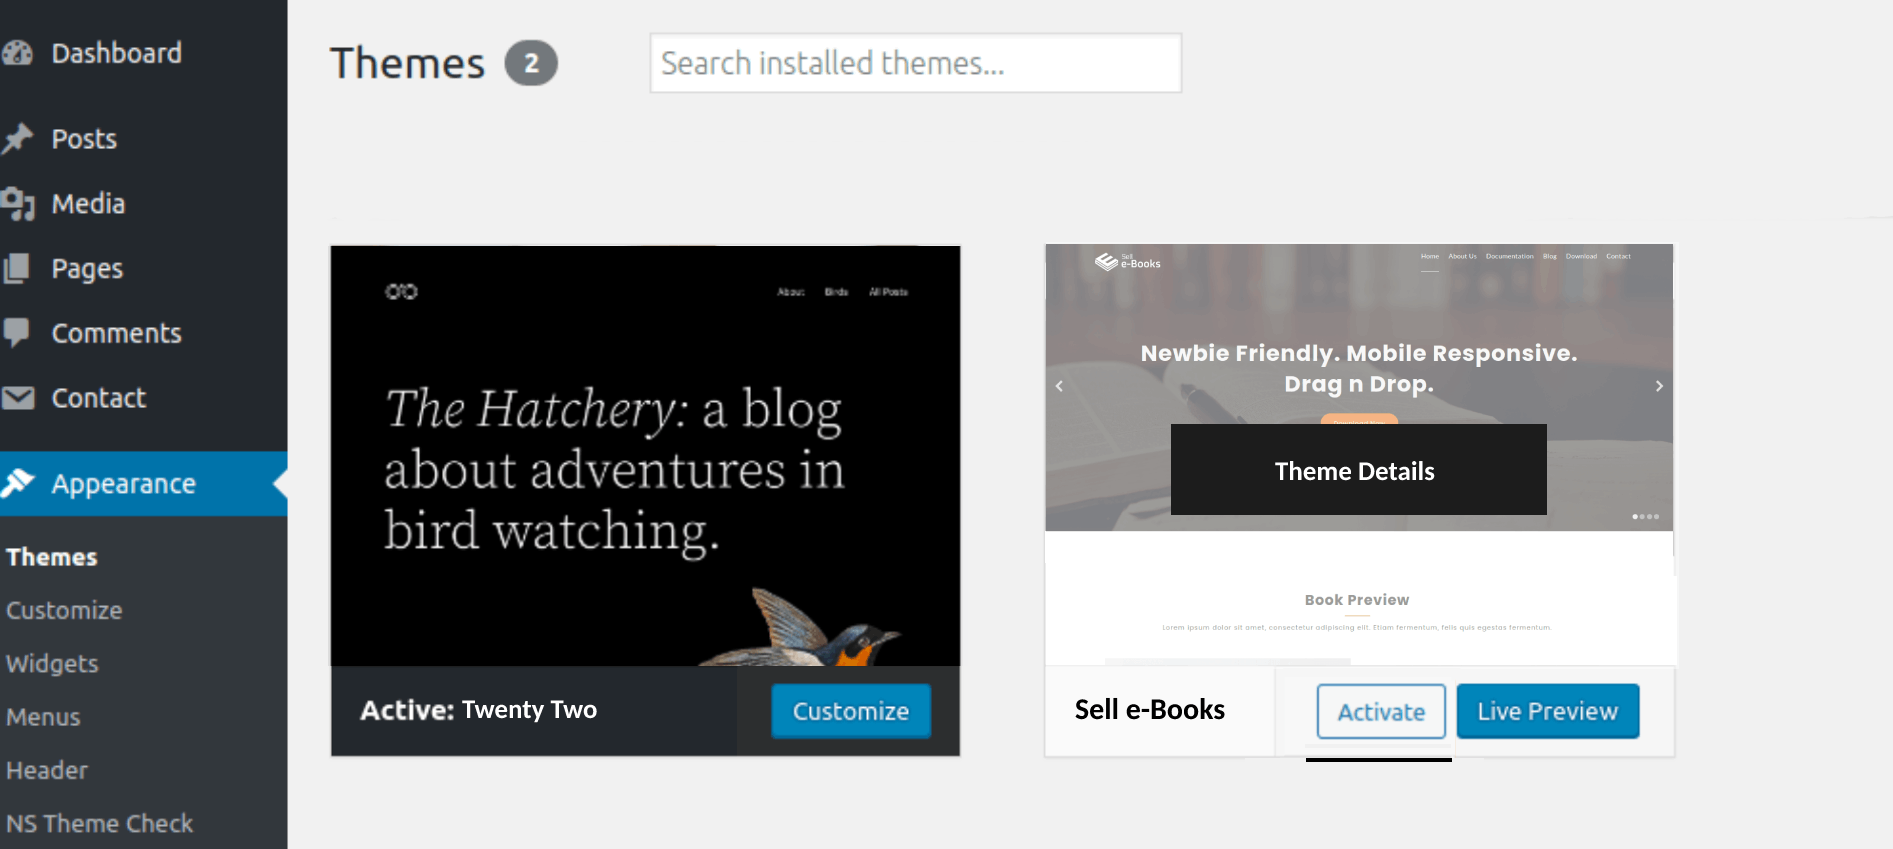
Step 5 - Wait while the theme is installed, when done Activate the Sell e-Books Theme. (see screenshots below)
Click here to know more about WordPress theme installation.
Dummy Data
Step 1 - Click here to
download the dummy data of Sell e-Books WordPress theme as seen in the demo and then go to Tools => Import Menu to import this XML file.
Step 2 - Importing Customizer Data : Sell e-Books is driven by WordPress customizer so to import customizer data first of all you need to download this customizer file then you need install this plugin https://wordpress.org/plugins/customizer-export-import/ Once installed, go to Appearance => Customize => Export/Import menu and then IMPORT the sell_ebooks.dat file which you just downloaded.
Step 3 - Importing Widgets Data : "Sell e-Books" demo has widgets data as well so to import that data first of all you need to download this wie file then you need install this plugin https://wordpress.org/plugins/widget-importer-exporter/ Once installed, go to Tools => Widgets Exporter & Importer menu and then select the sell_ebooks.wie file and click on Import Widgets button.
That's it! After this, you will get exactly the same website as the demo site.
Setup Home as Front Page
To Set up your home page as the landing or front page of your website, you need to go to General => Reading menu in WordPress admin panel as shown below :
Step 1 - Select static pages as front page and posts page from list as shown below.
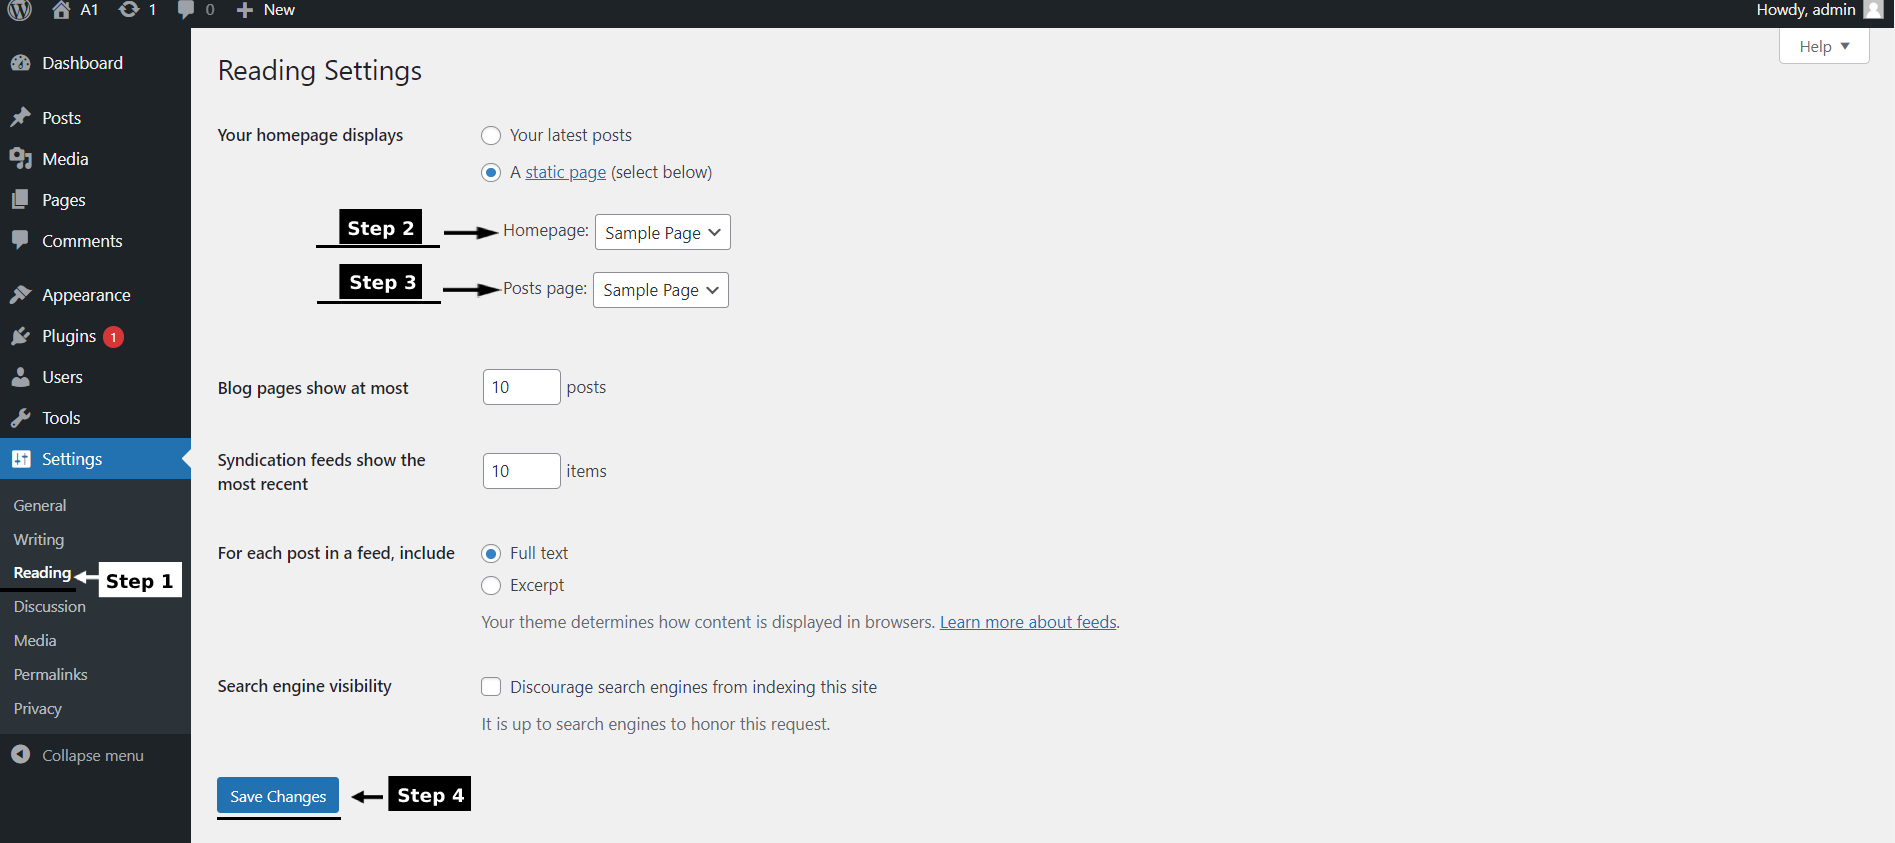 Then click on Save Changes button.
FAQs
Q.1 - How to create static pages or how to modify the imported page layouts?
Step 1 - Please go to SiteOrigin Page Builder Documentation to check how it works. This will help you in creating new static pages as well as modifying the imported ones.
Q.2 - How to upload logo and site icon?
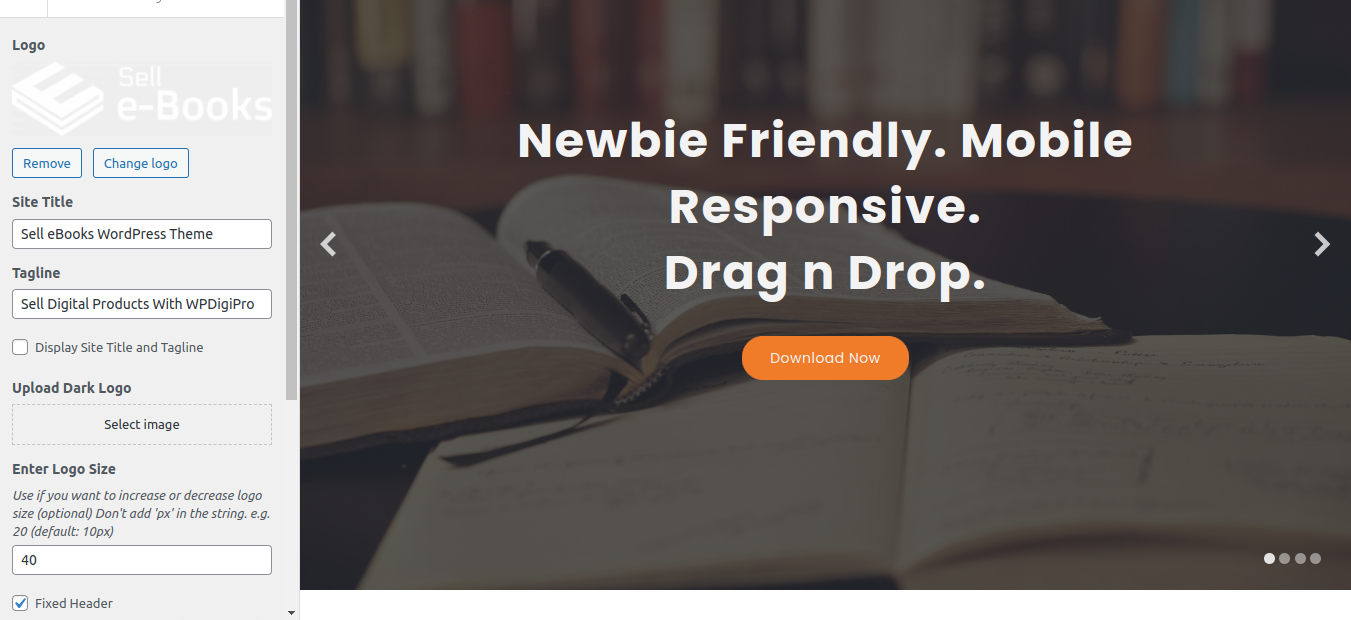
Step 1 - Please go to Appearance => Customize => General => Site Identity.
Step 2 - Here you can change your logo along with site icon and also add or remove site title and it's tag line. You can enable or disable the fixed header and change the normal and sticky logo size as per your requirements.
Q.3 - How To Integrate Social Icons?
Step 1 - Please go to Appearance => Customize => Footer => Social Accounts menu.
Step 2 - Here you can integrate your social accounts in footer section.

Q.4 - How to manage Homepage Settings ?
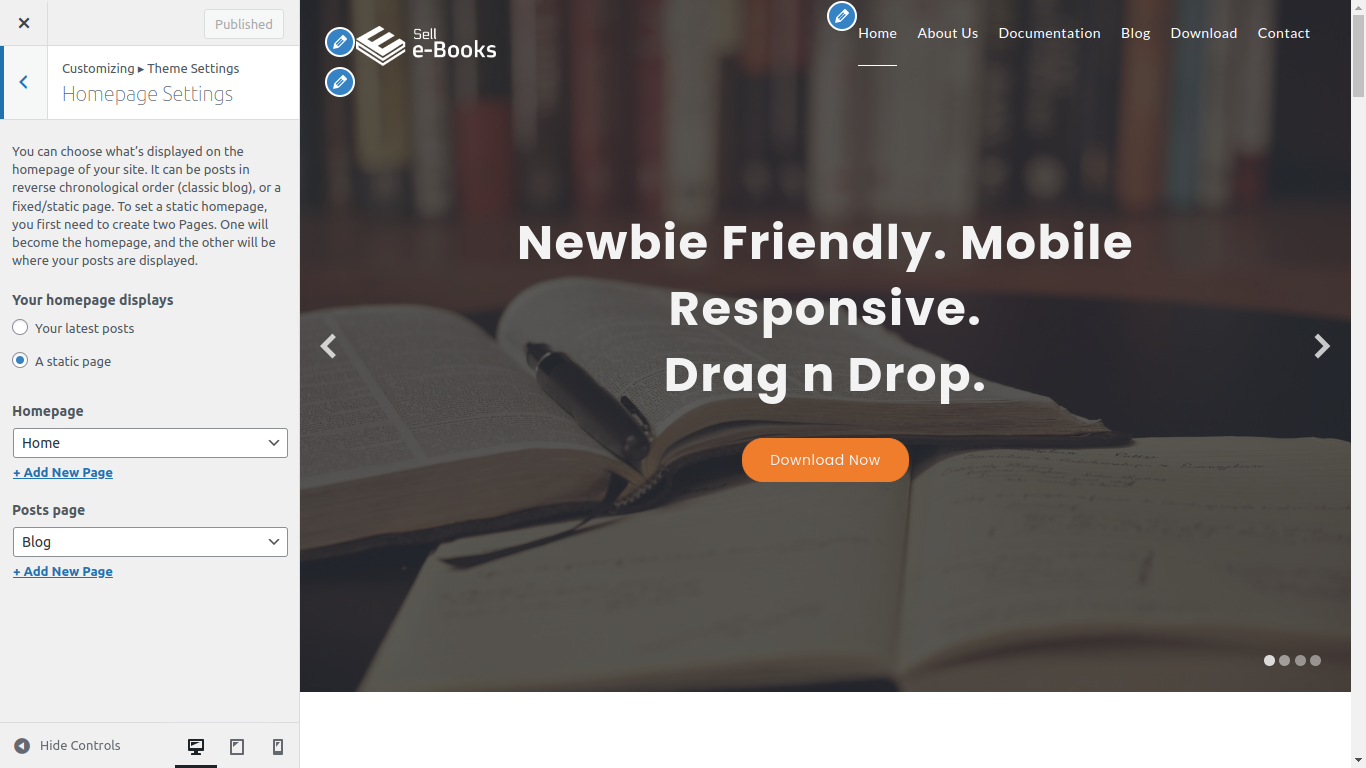
Step 1 - Please go to Appearance => Customize => Theme Settings => Homepage Settings menu.
Step 2 - Here you can display the latest posts in home page template using post categories. Also, you can show & hide your latest posts area in it.
Q.5 - How to manage your footer?
Step 1 - Please go to Appearance => Customize => Footer menu.
Step 2 - Here you can choose whether to show or hide your footer widget area along with the number of columns to show. If you want to add a copyright text in your copyright area then you can add it from here.

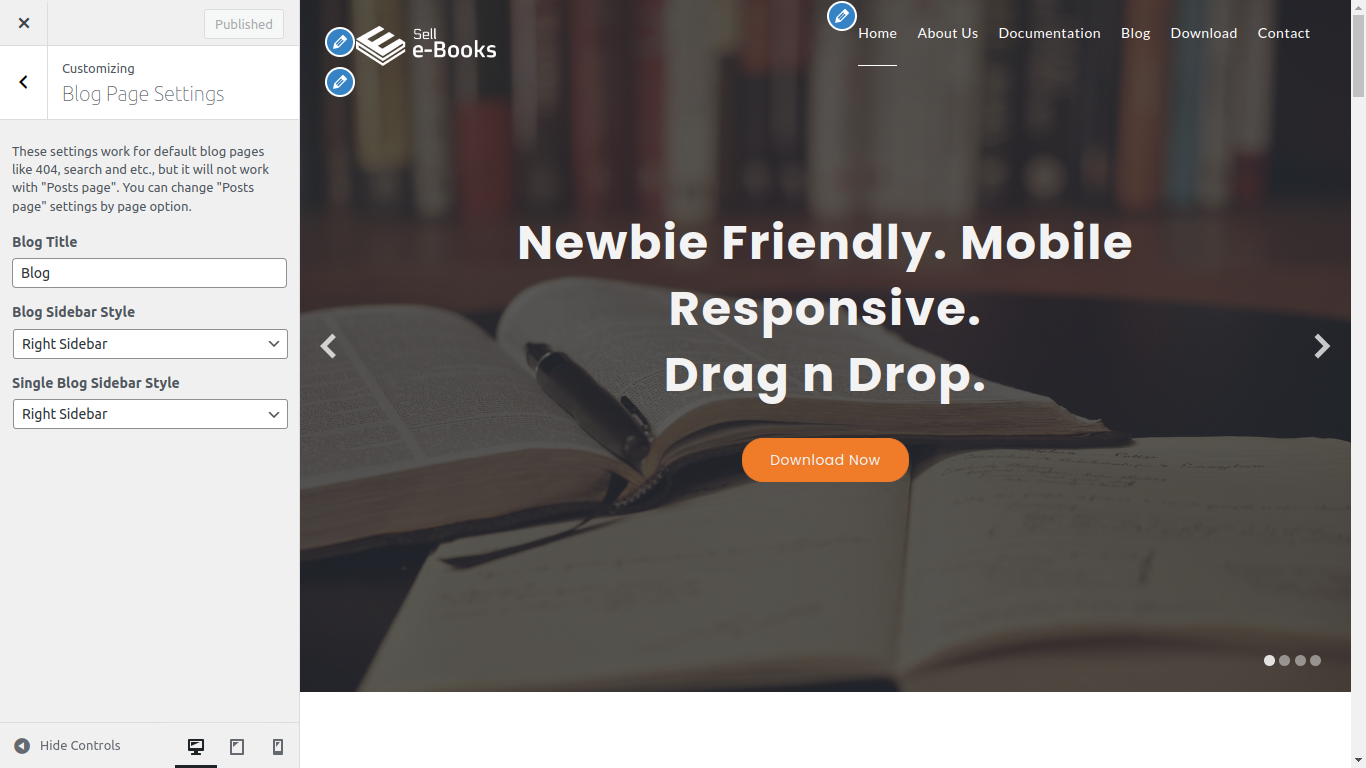
Q.6 - How to manage Blog Page Settings?
Step 1 - Please go to Appearance => Customize => Blog Page Settings menu.
Step 2 - Here you'll find options related to Title of the Blog, and, Alignment of the Blog.
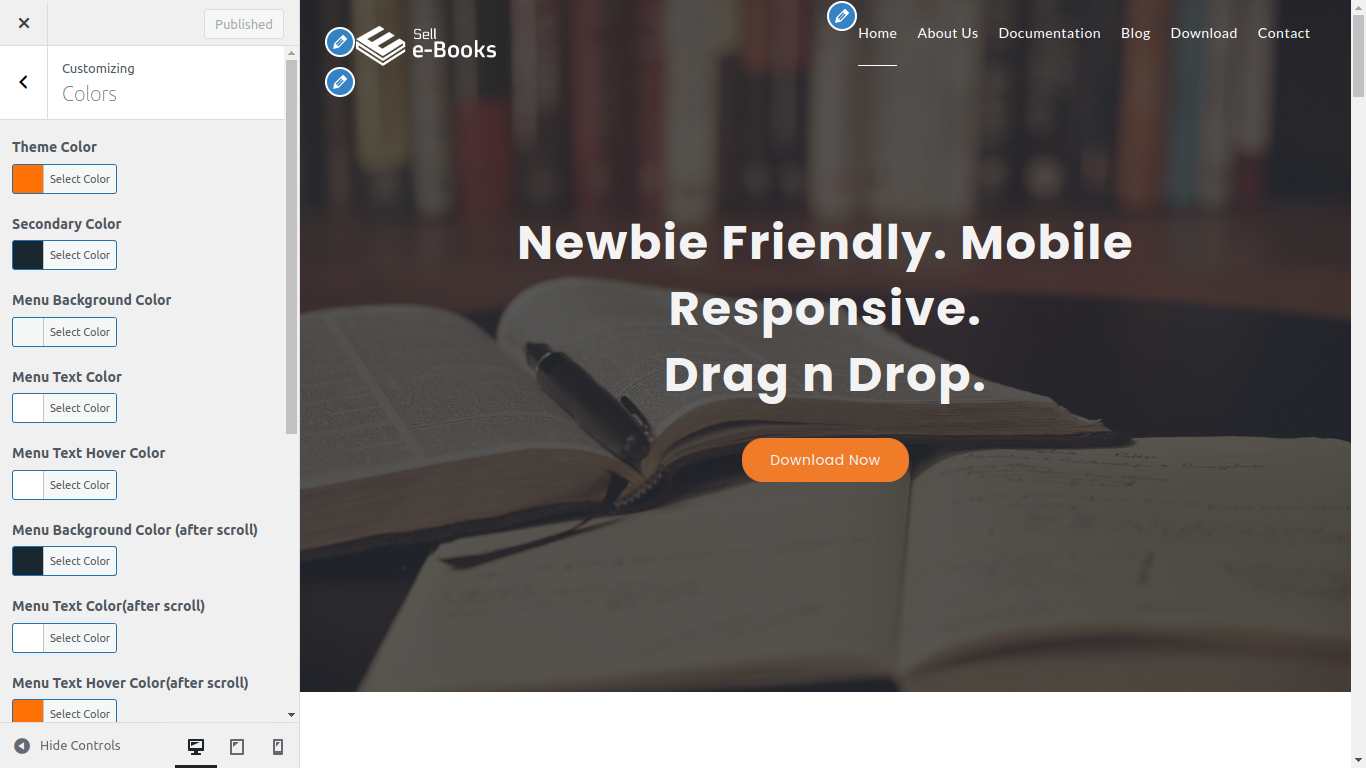
Q.7 - How to manage Colors of the theme ?
Step 1 - Please go to Appearance => Customize => Colors.
Step 2 - Here you can change theme color, link color, hover color and other colors related to website.
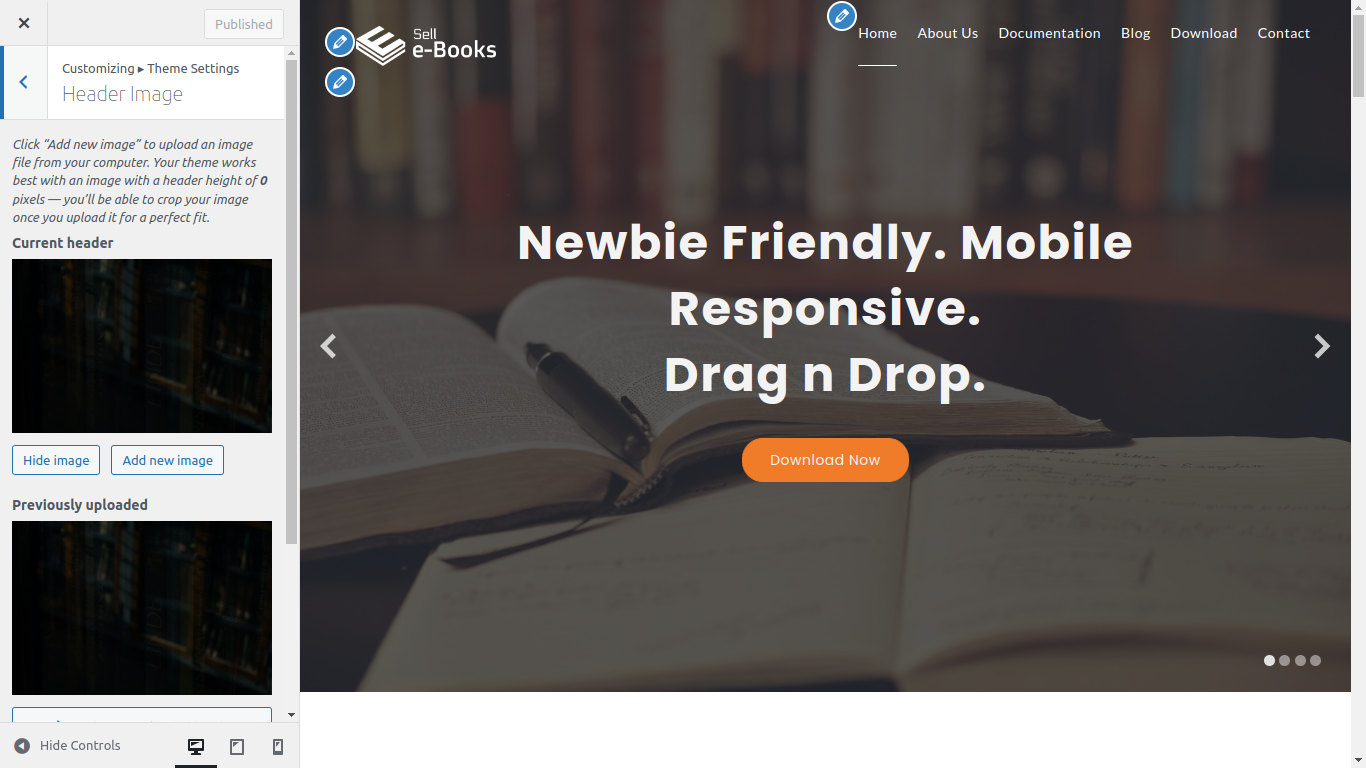
Q.8 - How to manage Header Image ?
Step 1 - Please go to Appearance => Customize => Theme Settings => Header Image.
Step 2 - Here you can change or apply new image for header on different pages.